Problem: The Leak Has Been Dripping for Weeks Before You Spotted It
Refrigerator supply lines fail in slow motion. A loose saddle valve might release one to two ounces a day. Plastic tubing kinked behind the fridge can weep at the bend point for months. By the time you see water on the floor, the laminate has already swelled, the subfloor plywood has darkened, and mold colonies have started in the dark space between the fridge and the wall. Most Hunting Creek homeowners we meet say the same thing: I just noticed it yesterday.
The hardware itself is the usual culprit. Plastic 1/4 inch tubing becomes brittle after five to seven years. Saddle valves were never designed for permanent installation, yet builders used them on millions of Hunting Creek Water Restoration and competing fridges through the 2000s. Compression fittings loosen as the appliance vibrates during defrost cycles. Any one of these failure points can drip silently for a full season before a homeowner notices.
Solution: Map the Real Moisture Footprint Before You Touch the Repair
You cannot fix what you cannot see. Before any drywall comes off or flooring gets pulled, we run thermal imaging and pin-type moisture meters across the kitchen floor, baseboards, lower cabinets, and the ceiling of any room directly below. A fridge leak rarely stays under the fridge. Water tracks along the subfloor seams and pools wherever gravity sends it.
- Shut off the water at the saddle valve or main supply line.
- Unplug the refrigerator and pull it forward six to eight inches.
- Photograph everything you see before cleanup, for the insurance file.
Once we map the affected square footage, we can quote drying, demo, and rebuild with real numbers instead of guesses. For deeper context on how we trace concealed moisture, our guide to hidden leak detection behind walls walks through the same tools we bring on every fridge call.
Problem: Your Insurance Adjuster Wants Documentation You Do Not Have
Sudden and accidental discharge from an appliance supply line is typically a covered peril on standard Hunting Creek homeowner policies. Long-term seepage usually is not. The line between those two outcomes is documentation: moisture readings, photographs, dated drying logs, and a clear scope of work written in adjuster language.
Solution: Open the Ceiling, Dry the Cavity, Rebuild Clean
We cut inspection openings to confirm joist condition, remove soaked insulation, and set containment so drying does not push moisture into adjacent rooms. Electrical fixtures in the wet zone get pulled and inspected. Once readings hit dry standard, we reinsulate, hang new drywall, tape, texture, and paint to match. The finish work matters. A repair that looks obvious after the job is not a repair we are willing to put our name on.
Solution: Targeted Demo, Structural Drying, Then Rebuild
Our process on a soft-subfloor job is straightforward. We remove flooring in the affected zone, cut out compromised subfloor sections, and set air movers and a low-grain refrigerant dehumidifier to bring the surrounding framing back to dry standard. Drying typically runs three to five days. We monitor daily and document each moisture reading for your insurance adjuster. Replacement plywood goes in, then underlayment, then your finish floor. If you want a deeper read on the cost variables, our breakdown of subfloor water damage detection and repair cost covers what Hunting Creek homeowners typically pay.
Problem: You Want This to Never Happen Again
Once the rebuild is done, most homeowners ask the same question: how do we keep this from repeating. The good news is that fridge line failures are largely preventable with three small upgrades.
Solution: Three Upgrades Worth Making During Reinstall
- Replace any plastic supply line with braided stainless steel rated for icemaker use.
- Remove the saddle valve and install a proper quarter-turn shutoff at the cold water tee.
- Add a battery-powered water sensor behind the fridge that alarms on contact.
These three changes cost under one hundred dollars combined and prevent the most common failure modes we see on Hunting Creek Water Restoration and other refrigerator brands across Hunting Creek homes. We install them as a standard add-on whenever we reset a fridge after restoration work.
Problem: You Smell Mildew Every Time You Open the Lower Cabinets
That smell is the early warning. Refrigerator leaks feed mold growth inside cabinet toe-kicks, behind baseboards, and along the back wall where the supply line enters. Within 48 to 72 hours of sustained moisture, microbial growth begins. By week two, you can have visible colonies behind the cabinet boxes.
Solution: Let Restoration Handle the Paperwork
We write our estimates in Xactimate, the same platform most carriers use. We provide daily drying logs, before and after photos, and direct communication with your adjuster so you are not the middleman. If coverage is denied or partial, we tell you exactly what is covered, what is not, and what your out-of-pocket will look like before any work continues.
Solution: Contain, Remediate, Confirm Clearance
- Build containment around the affected cabinetry and seal HVAC returns.
- Remove and bag contaminated materials under negative air pressure.
- HEPA vacuum, antimicrobial treatment, and post-remediation verification.
If colonies are extensive, we coordinate with a third party for clearance testing. Our team also handles the follow-up rebuild so you are not juggling three contractors. For the science on why fast response matters, see our overview of mold after water damage.
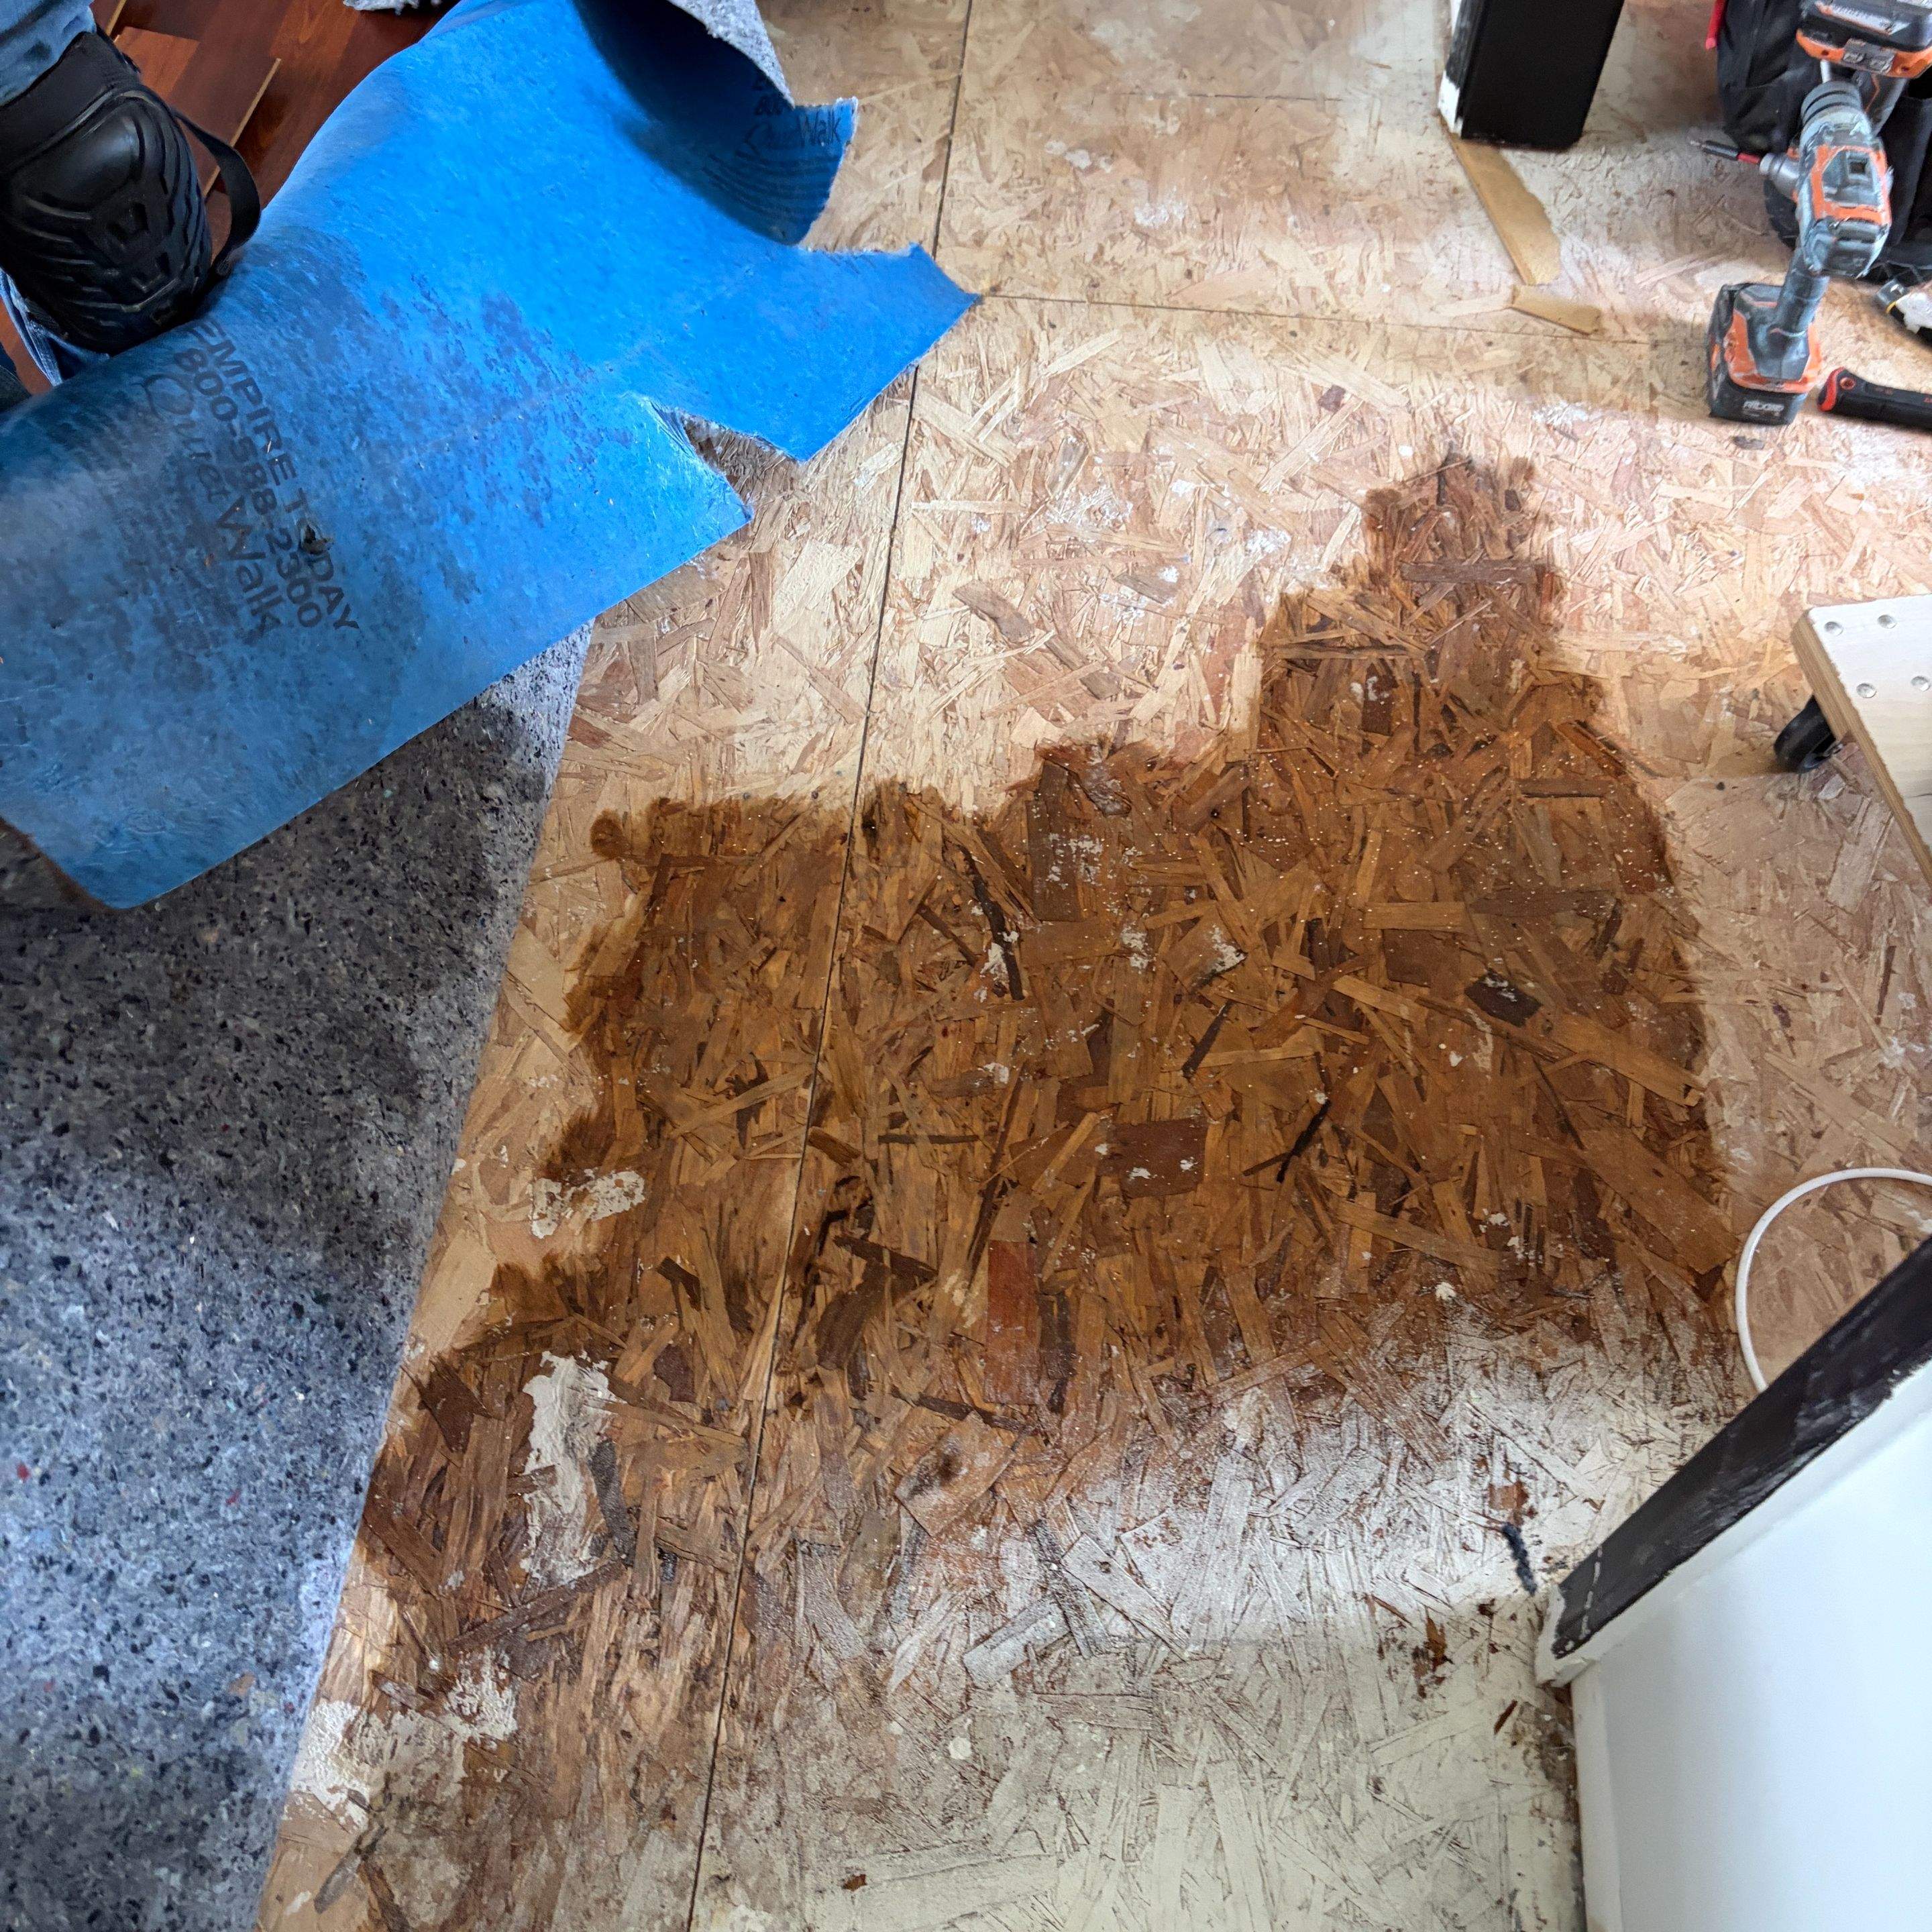
Problem: The Subfloor Under the Fridge Is Already Soft
Refrigerators sit on the most vulnerable spot in your kitchen. The appliance weight, combined with constant low-grade moisture, accelerates rot in OSB and plywood subfloors. When we step on a fridge footprint and feel sponge, we know the damage extends past cosmetic repair. Cabinets along that wall often share the same subfloor sheet, which means the kitchen base cabinets may be compromised too.
Problem: There Is a Brown Stain on the Ceiling Below the Kitchen
If your kitchen sits over a finished basement or a first-floor ceiling, a fridge leak announces itself downstairs first. You will notice a yellow or brown ring, sometimes a soft bulge, sometimes peeling paint. The stain is rarely the worst part. The insulation above it is usually saturated, the joists are wet, and any can lights nearby have become electrical hazards.